Table Of Content
In the following sections, we are going to use two shading techniques for the two types of hair we’ll be exploring. If you can, draw your own head base, but if what you’re looking for is pracrice, you can printe the one we have right here and draw on top of it. Hair can represent social status, gender, ethnicity, and other features that are important to people. It is worn in different styles, colors, lengths, and textures.
Step 3 – Refer to the image to plan the next steps
Hair is a very important point of expression for our characters, so drawing hair exactly as we imagine it can be a real challenge. I try to break it down and think three-dimensionally and consider the volume and shape of the hair form with drawing hair. To further enhance your hair drawing skills, seek feedback and constructive critique from fellow artists or mentors. Join art communities or online forums where you can share your work and receive valuable insights from others. Now that you have the basic structure, strands, and volume, it’s time to refine the details. Pay attention to smaller elements like flyaway hairs, wisps, and stray strands to add a sense of realism.
Dimensional Color Hair: The Magic of Multi-Dimensional Tresses
Try and make the shading strokes in a way where they flow along the different hair clumps and folds. Also try and keep your strokes somewhat visible (don’t blend them too much) to create an effect of individual hairs as you shade. The main goal of this step is to apply an initial layer of shading that will define the light, medium and dark areas of the hair. Gradually add in the smaller folds and clumps of the hair to better define it’s shape. You can erase parts of the outline from the previous step where needed. The other styles have shortened instructions to avoid repetition.
About This Article
And when I draw it, I like to give it a prickly, pointy, rough appearance. I followed all these criteria to brush up my character and then I added the necessary amount of detail while keeping it simple. • I added some texture, following the direction of the curves.
Again add in the hairline over top of the head drawing. Apply small, circular strokes to the hair area with Terra Cotta. Use a light touch, taking it out into the skin area to create a hairline.
Now that we have a quick lesson on drawing hair in graphite under our belt, let’s learn a few tips for drawing hair with colored pencil. Make sure to fill it all and to make some of the curls noticeable outside of the hair shape. To enhance your hair drawing skills, take the time to study and collect references of different hairstyles, haircuts, and hair arrangements. Over top of the drawing of the head add an outline of the main shape/shapes of the hair.
How to Draw Hair Step by Step Tutorial
The best way to make the process of learning how to draw realistic hair easier is by preparing properly for it. The curves and waves of the hair were done with long, curved pencil strokes. The blue and orange tones were added on top with a burnished approach. Then, blend the drawing with a stump or tortillion.

Add some loose small, and long hairs with your mechanical pencil for an extra touch of realism and fluidity. Again, with your mechanical pencil or your 4B pencil, mark the hairline position very softly. Hair is so different from each other that using the same technique for every type of hair would be impossible. Each type needs its own technique, and some are easier and simpler while others take a long time to do. On the other hand, straight hair has serene, calm, simple and maybe elegant lines. Try to follow your intuition when drawing shadows and highlights for hair.
Step 8
Ranking Every Sketch from I Think You Should Leave with Tim Robinson - Paste Magazine
Ranking Every Sketch from I Think You Should Leave with Tim Robinson.
Posted: Fri, 18 Nov 2022 08:00:00 GMT [source]
To begin, lightly sketch the basic shape of the hairstyle you want to draw. Use simple shapes like ovals or rectangles to define the overall structure. This step will serve as a foundation for the rest of your drawing.
Each style includes step by step drawing examples and explanations. Then, use long, curved pencil strokes to create the shapes of the curls. It has to do a lot with the shape of the head and the position and type of hairline. Before you start coloring in your drawing, we shall add some final details in this step of our guide on how to draw realistic hair. For this part of your realistic hair drawing, simply keep drawing more thin lines to the upper right section of the hairstyle. Lightly draw the shapes of the hairline, ear and overall shape of the hair with mechanical pencil.
Gently outline the hair without drawing lines that are too thick. Make the general outline complete by drawing the hairline next to the ear. Shade the hair now, thinking in terms of strands, not single hairs. Outline the whole hair, following the rhythm of strands.
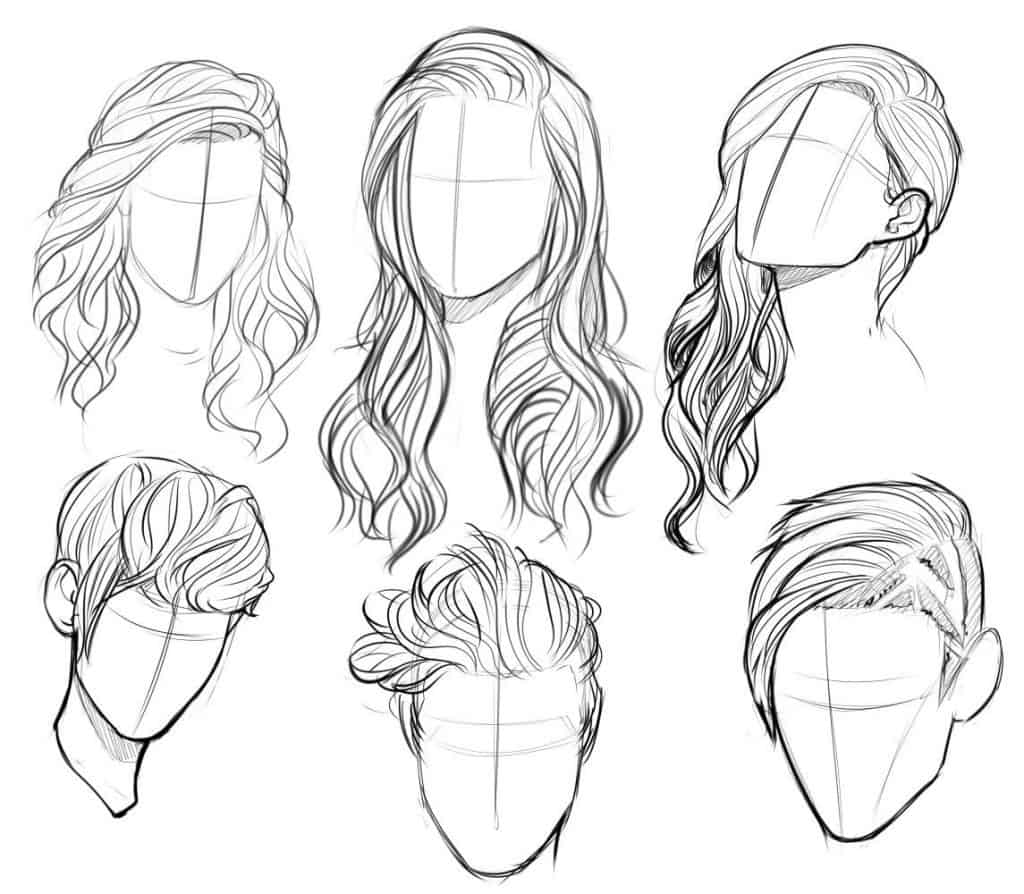
Adding realistic hair to a portrait can make it come to life. It's totally understandable if you're feeling intimidated, but we've got you covered! We'll help you break the process down into manageable steps and add details one layer at a time to achieve realistic-looking hair in your drawings. Read on for a detailed guide on outlining, sketching, shading, highlighting, and more. This tutorial shows how to draw female hair with three different hairstyle variations including natural looking, straight and curly hair.
The perspective and angle of the head might make them look smaller or narrow. Drawing hair can be a challenging yet rewarding endeavor for artists. Consider the direction and flow of the hair strands, and add subtle curves or arcs to convey a sense of motion. This will make your drawings appear more lively and engaging.
Gradually darken the overall drawing until you create a good balance between the various areas of the hair. Be sure to keep the strokes in the light and mid tone ares visible by leaving some distance between them. After you draw the hair strands, use Terra Cotta to give it a reddish shine. Leave a band of light in the protruding areas so the hair looks curved and wavy.
Close the shape of each strand by mirroring its wave and adding a pointed tip. In this case it will also be the outline of the whole haircut. In this lesson I'll show you three simple ways to approach hair that will make your cartoons look far more professional. Add in the smallest sets of hair splits, folds and clumps to finish the line drawing. Erase the hairline and parts of the head covered by the hair once done. Same as the previous example begin by making an outline drawing of the head.


No comments:
Post a Comment